
3 of our 4 children have birthdays in the month of July. My own birthday falls in the same month too. Because their birthdays are so close together, my husband and I have to be cost conscience and creative with their celebrations. My sisters and I were all born in July, and I remember combining our birthdays into one day for our family’s convenience almost every year. Maybe it’s because of that, I find it especially important that all of our kids feel like their birthday is a special day all about them.
For our oldest daughter’s 4th birthday, she wanted a princess ball. I knew I was going to be released from the hospital after having surgery just days before her birthday so I needed to plan a simple party that would still be elegant and fun. We reserved a plain birthday room at a local fast food place for free, which was simple to decorate into a royal banquet room and had the added advantage of a play land just outside.
Princess Castle Maze Invitations
I found a website that offered a free printable activity page featuring a castle garden maze, then created invitations on our computer as a simple Word document using this maze as the starting point. I inserted the castle graphic into 2 equally sized text boxes on one page and added the text “Princess Kaliann is inviting you to a Royal Birthday Ball at the Castle. Walk through the gardens with the Princess. She will lead you to the Castle doors where the grand party plans will be revealed.”
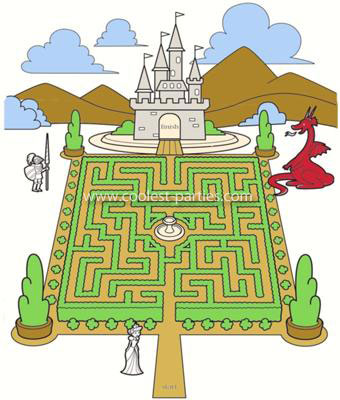
Inside one of the “castle” doors on the maze was a peek a boo flap that showed all the party details. I include some tips on how I did that below. I purchased some 5×7 parchment envelopes with matching sheets of parchment paper and ivory colored cardstock at a local stationery supply store, then printed both the invitation page on cardstock and the details of who, when, and where on the parchment. Then I printed as many copies as needed to include one for each of our party guests.
A basic glue stick was used to attach each cardstock sheet over a sheet of parchment before cutting the two invitations from each page with a little trimming. I used a zacto knife to cut along the line of the castle door to make it open/close (without cutting through the parchment backing) so that the text on the parchment could be seen when the cardstock door flap was opened.
I also purchased a calligraphy pen at the same store to hand write the addresses on each envelopes. For a larger party, computer printed labels with a fancy font would have been the preference, but our party list was small enough to accommodate this special touch. The invitations were really fun to make and they turned out so great, I’ve been able to offer them as a service to others locally and on Ebay!
We ordered a tiered castle cake from a local bakery and the coordinating cake decorations kit from Ebay. Having the cake done by a baker cost a little more than ordering a birthday cake from a supermarket, but not all that much, and the taste and quality of the design made it well worth the extra cost. The cake was literally a castle topped with a different Disney princess on each castle pillar. Each tier of the castle was a different flavor: chocolate w/fudge filling, vanilla w/lemon filling, and chocolate w/strawberry filling.
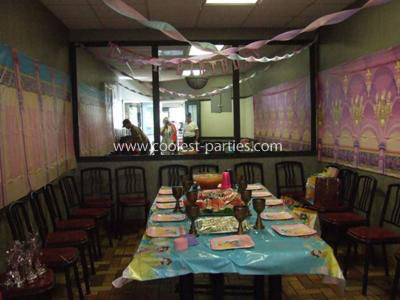
We decorated the party room with a palace scene party wall mural that we purchased from a party supply site online. The bottom half of the wall in the party room was bordered with nice looking gray wall paper so we cut the palace mural in half horizontally to separate the top chandelier scene from the bottom pedestal scene. This gave us more of the mural to spread around the top half of the wall in the party room and made the gray border look like it was part of the décor. Another wall in the party room was mirrored, which added to the glamour and elegance of it all.
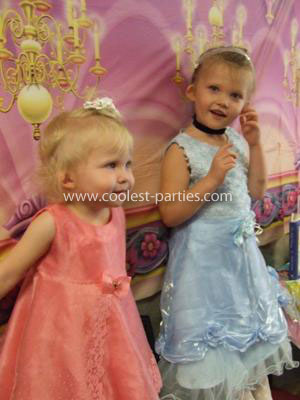
We decorated the table with plastic “jeweled” goblets found online at Birthday Express and a lunch feast of fresh fruits, tortilla pinwheels we made at home, and a punch bowl of festive sparkling fruit punch. The fast food place didn’t have strict requirements about purchasing food from them so we chose to provide our own food, which was cheaper. All of the girl guests came dressed up in their favorite dresses and boy guests came dressed normally. We provided them with inexpensive knight costumes to go over their clothes made up of capes, plastic shields, and crowns found at a local dollar store. We found special fancy dresses for our own princesses on Ebay for less than $15.00 each and put some of their accessories from home in a Disney princess box for them set out at the party to play “dress up” with the party guests.
We used some paints we already had for face painting, purchased small hand mirrors and adhesive jewels for the kids to decorate, and let all the kids play together on the slides and climbers (the “palace gardens” of the restaurant). There was a music CD of Disney princess songs playing in the background on “repeat” mode. It was very festive. The children had such a great time, yet the party was fairly simple.
We highly recommend this party for your little knights and princesses. Our daughter wanted to focus on Disney princesses, but this party can easily include a princess or medieval theme in general with an age range from preschool to middle school. The memories are precious!
Related posts:
 Coolest Princess Birthday Party Ideas Your Coolest Medieval Knight and Princess Theme Party Ideas
 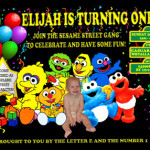 Coolest Sesame Street First Birthday Party Ideas Coolest Birthday Party Ideas for an Awesome Sports Theme Party Coolest Sesame Street and Elmo Birthday Party Ideas
 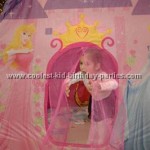 Coolest Princess Party Theme Ideas
  Your Party Tales | Coolest Kid Birthday Party Ideas Coolest Fairy Child Birthday Party Idea